Email marketing remains one of the most effective communication tools in marketing and can be used to acquire new customers, upsell to existing customers and win back previous customers.
Here is a comprehensive playlist about creating emails in Kulea.
Follow the steps below to create your Kulea emails which can be plain text or html branded emails.
Plain text emails:
HTML emails:
This has been split into useful chapters to guide you through adding, editing, deleting, rearranging sections, using colours, and using different images, buttons, and other content sections
Step by step guide to creating an email
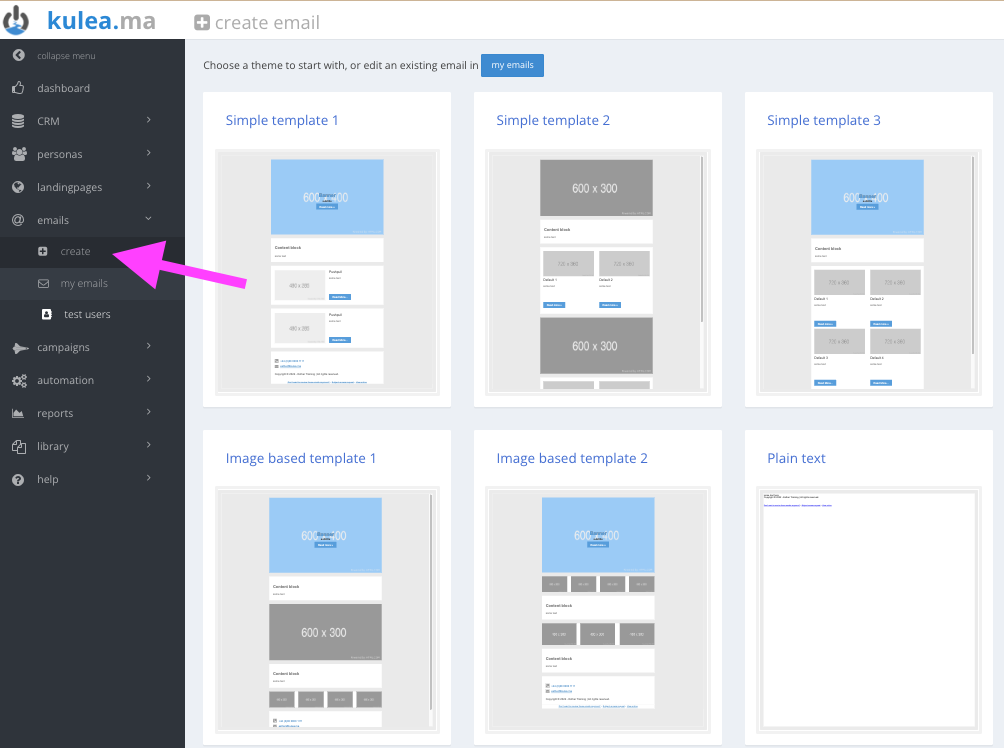
2) Select a layout that best suits the content of your email
The drop down, which defaults to ‘wysiwyg’, allows you to select the device of choice and the preview will update accordingly
The preview also acts as navigation; simply click the content area you wish to edit (the selected section will get a yellow border highlight) and the details will show on the right
You’ll see tabs for 'settings', ‘layout’, ‘add a section’.

As you click to edit sections of your email (on the left) the panel on the right will show you the editing options for the section. It also allows you to add content for your different personas and navigate between the persona-lised®
content accordingly.
See how to add persona-lised® content into your emails
Simply click the ‘< back’ button (at the top of the right hand panel’) to get back to the content overview
To add a new content section, click the ‘add a section’ button and select the content section you want to add. New content sections are added to the very top of the email & the right hand panel automatically updates so you can edit the content.

To move content sections around the email, first ensure you’re on the ‘layout’ tab (just keep clicking the ‘< back’ button at the top of the right hand panel to get back to the content overview). Then click and hold the ‘x’ icon on the right of the content section you wish to move and simply drag it up or down the list. The preview on the left will update accordingly.
To delete a content section, simply click the red ‘trash’ icon.
To duplicate a content section, simply click the ‘blue’ duplicate icon and then move the new content section as required
To edit a content section:Select the content section on the left preview OR click the green ‘pencil’ icon on the right OR click the field of interest on the right

To add personalised content to any of the content areas, simply click ‘+ CRM’ field; select the CRM field you want to add together with the alternative text
What's the difference between personalised and persona-lised® content?
Add the personalised content by clicking the green ‘+’ icon
You’ll notice a number of tags have been added to the field itself. These cater for the personalisation and alternative copy (used for unknown users) and consist of an opening tag that detects if the user is a known user - [[if-chosen CRM field]] then the CRM field itself [[chosen CRM field]] & the text associated with it. The CRM field is then closed [[/chosen CRM field]] & the ‘else’ statement added [[else -chosen CRM field]] to ensure the alternative text for unknown users is added and then closed [[/else-chosen CRM field]]
Don’t delete these; if you do the personalisation won’t work correctly.
You can add as many CRM fields as you like to any content area
And repeat for each content section to fully populate your email

Sending a Test
If you haven't already, you will need to set these up first in 'campaigns' > 'test'. To send your email as a traditional mass mail campaign, simply navigate to 'campaigns' > 'create' and complete the required information.
Add a test user and send a test email
Using the steps in the journey planner