Kulea allows you to create your own forms as you need them and tailor them to each persona. You can even personalise them and autofill form fields so that your known users don’t have to type in the information you already have.
This article assumes you know how to create Landing Pages.
How to create your own web form:
1) On the right-hand side, click the ‘add a section’ tab and choose ‘form’
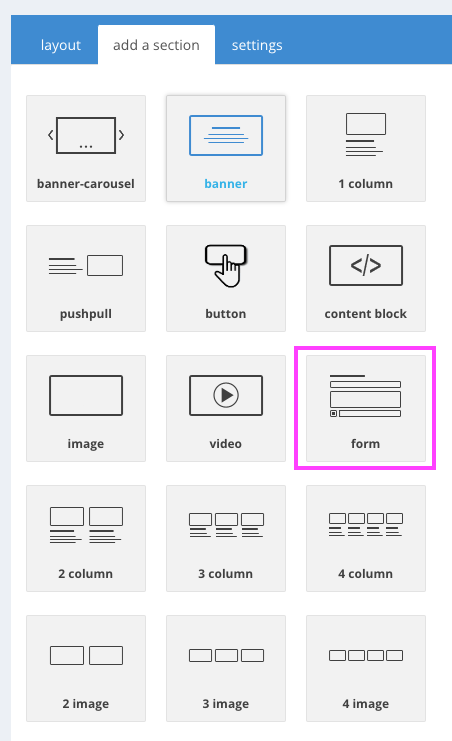
- On the right, the form block configuration panel is opened.
- On the left, you’ll see the form at the top of your landing page with a content block, a capture field, and a submit button.


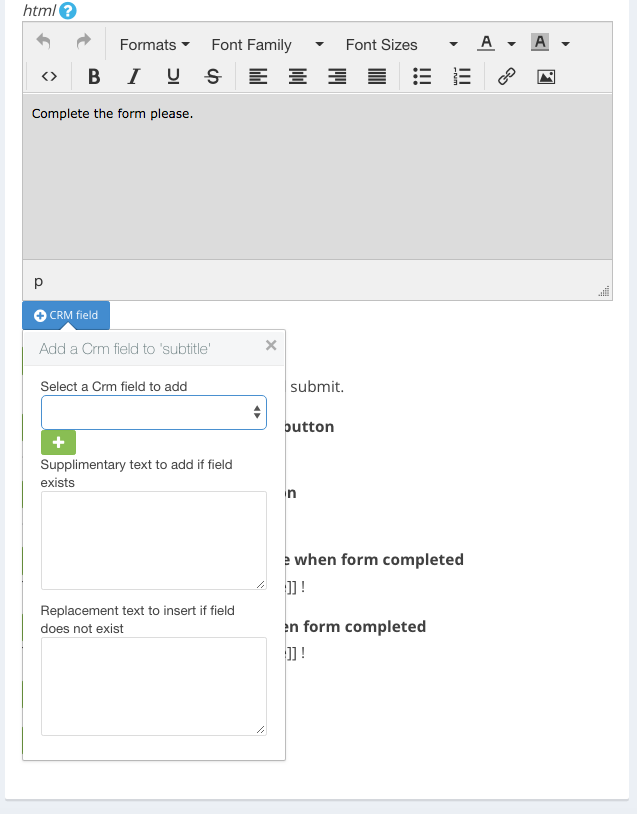
3) Select the green edit buttons in the form configuration panel to edit the background, the content, the button, and the form completion actions.
- Remember content is for Persona X first, so keep it generic.
- If you want to add any personalised content to any of the content areas, simply click ‘+ CRM’ field; select the CRM field you want to add together with the alternative text
- Add the personalised content by clicking the green ‘+’ icon
4) To update the layout of the form:
- click the back button, then click layout - this takes you to the layout of the landing page with the form section at the top
- Here you can drag the form into position on the landing page wherever you want it to appear
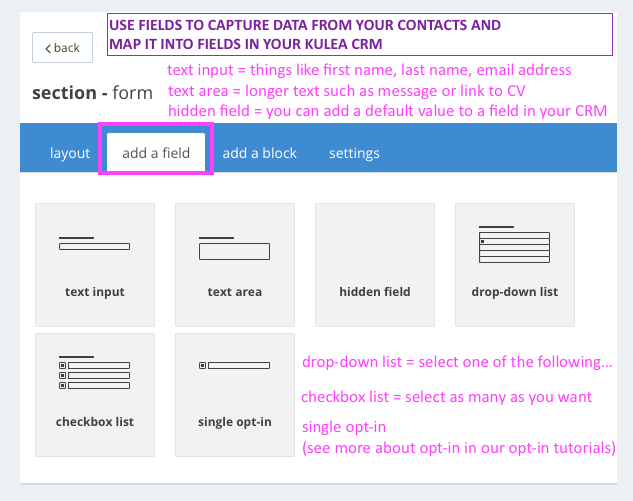
- Click the green edit pencil to edit the form layout, add/remove form fields, and add sections and images


- Click ‘add a field’ to capture more relevant info about your contacts
- Fields can be input text, text area, hidden field, drop-down, checkbox, single opt-in
- see more about the different types of form fields here
- see more about single opt-in vs double opt-in here

- When you have selected a field to add, edit it to map it to fields in your CRM

- Navigate back to ‘layout’ and you’ll see the new fields have been added

6) Once you have finished building Persona X's form (the default content), you can persona-lise® the form blocks if required (as you would any other content)


- Simply select the Persona you want to edit within the blue block in the editor.
- You’ll see a drop-down to select and a green ‘+’ icon to add persona: click on the drop-down to select the persona you wish to use & click the ‘+’ icon
- You’ll see that Persona X has been replaced with the persona of your choice and all the content has been copied over as well
- Edit the regions as required
- You can navigate between personas on the blue box.
7) To preview your landing page in your browser, click preview on the top right. This will default to your information (so you can see your personalisation in action):
8) Select different personas to preview the different content for each one.
